


Improving photos for free is easy because many tools fix simple image problems today. They can sharpen edges, brighten dark areas, and bring back small missing details. As a result, old pictures look clearer and become easier to use for daily needs.
Using “enhance photo free” tools helps when you want fast edits for posting. They open in the browser and run well even on weak or older devices. In turn, they support easy updates for schoolwork, social pages, and simple creative tasks.
Part 1. Why Image Quality Drops and Causes the Need to Enhance Photo Free
To understand why “AI photo repair free” tools matter, it helps to know the following common reasons for image quality loss:
- Low Resolution: Small photos stretch too far and lose clear edges in many important areas. When enlarged, these images become blurry fast and make the main objects hard to see.
- Poor Lighting: Dark scenes hide important details and make colors look dull or very uneven. Strong light can also wash out the picture and remove detail from bright parts.
- Motion Blur: Moving subjects create soft shapes that make the picture look unclear and messy. Shaking hands during shooting also blurs edges and mixes objects into the background.
- Compression Loss: Heavy compression removes needed picture data and makes shapes look blocky on screens. This also changes some colors slightly and weakens clean lines around detailed areas.
- Digital Noise: Low-light shots create grain that covers clear areas and hides small, important details. Older devices may add tiny specks that reduce overall clarity across dark sections.
Part 2. Enhance Photo Free: Quick Ways to Boost and Perfect Your Images
Let’s explore the following “photo repair online free” tools to make your images perfect:
- Repairit Online
Repairit Online works as a photo enhancer tool that improves weak pictures with simple steps. It brightens dark areas and strengthens colors that look faded or washed out today. The tool also sharpens edges, so objects appear clearer without adding harsh effects. Moreover, users upload photos easily and view instant previews showing each visual improvement.
Since photos often lose detail when moved or stored, Repairit Online helps bring that clarity back. It improves skin tones, restores light balance, and lifts shadows that hide important details. The tool runs inside a browser, so users avoid heavy downloads or confusing software. This makes it a practical choice for quick online photo enhancement.
Key Features
- Safe Recovery: Creates a repaired copy while keeping your original photo safe from unwanted changes.
- Clean Interface: Uses a simple layout that guides beginners easily and avoids distracting advanced controls.
- Smart Detection: Finds damaged or unclear parts automatically and improves them with simple online controls.
Stepwise Guide to Enhance Photos with Repairit Online
To enhance your images with Repairit Online, stick to the steps given below:
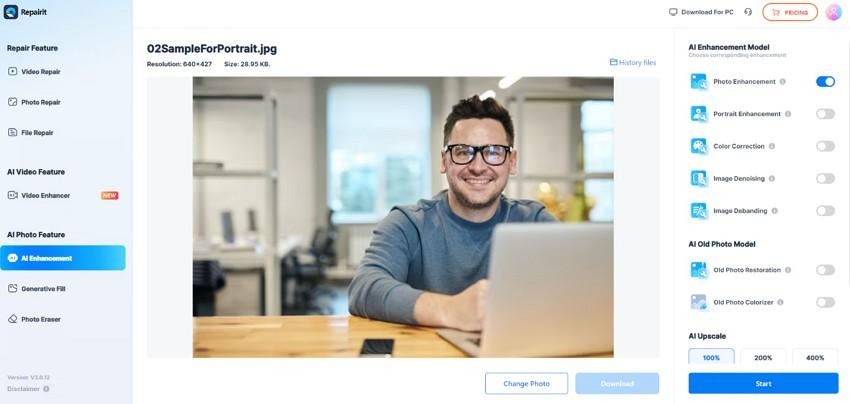
Step 1. Upload Your Photos to Proceed
First, open the AI Enhancement page and click the “Add Photo” button to upload your images.


Step 2. Start the Photo Enhancement
Next, turn on the needed enhancement models on the right panel before starting processing. Then choose your upscale option and press “Start” to begin enhancing your photo.
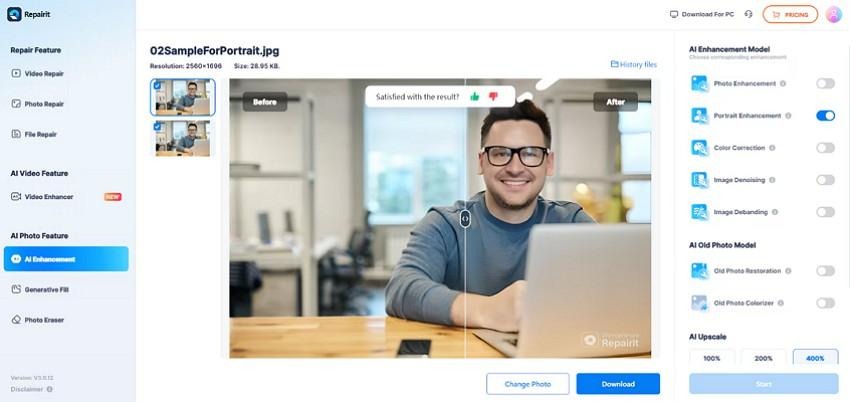
Step 3. Preview and Download the Enhanced Photo
Finally, use the “Before” and “After” sliders to compare the original image with enhanced results. After that, press “Download” when satisfied to save the improved photo on your device.

- Cutout.Pro
This upscaling tool fixes blurry, noisy, and dark images using basic AI help. It improves faces, old photos, and pictures that need clean and clear results. The platform offers AI photo repair free choices that enhance details without extra skills. Most images look better fast, though some strong fixes may need paid credits. To begin using this tool well, follow the step-by-step guide given below:
Step 1. To start, click the “Upload Image” button on the Cutout.pro homepage and select your picture.
Step 2. Here, review the enhanced output and choose the “Free Download” button on the right panel to save it to your device.
Cons
- Creates an over-processed look on faces and low-quality images.
- Uploading large or sensitive photos online can be slow.
- Picsart
Picsart helps users enhance photos free with basic sliders that adjust color and light. It improves dull photos using easy tools that remove marks and sharpen simple details. This tool also changes backgrounds to make images look clean for quick sharing. Follow the stepwise guide below to use Picsart’s helpful tools to boost creativity:
Step 1. First, upload your photo by clicking on the “Browse Files” option to proceed further.
Step 2. Review the enhanced output and use the “Slider” icon to compare both versions. Once the result looks correct, click the “Download” button to save the improved image.
Cons
- Many main AI features stay locked behind paid plans.
- Extra tools may distract users who need only a simple enhancement.
- PicWish
This photo enhancer makes unclear photos look better by adding detail through simple AI. Sharper faces and readable text appear because the tool reduces blur in weak images. Above all, bigger and clearer pictures are possible when the enhancer increases in size without losing quality. Adhere to the stepwise guide below to learn how to use PicWish properly:
Step 1. First, press the “Upload Image” button on the PicWish AI Photo Enhancer page to add your picture.
Step 2. Next, review the Before/After comparison to confirm the improvement in your photo. When the result looks correct, click the “Download Image” button to save the enhanced version.
Cons
- Better quality results often require credits or paid plans.
- Limited manual controls for users needing detailed adjustments.
- ImgUpscaler
ImgUpscaler uses AI photo repair free upscaling to enlarge small photos with better clarity. Sharper lines and stronger textures appear as the tool recovers details lost during resizing. Improved image quality helps users prepare photos for printing, design work, or digital posts. Let’s move to the stepwise guide below to learn how to use these features across ImgUpscaler:
Step 1. First, press the “Upload Image” button to bring your photos into ImgUpscaler for instant enhancement processing.
Step 2. Then click the “Download” icon above the preview to save the results to your device.
Cons
- Focuses on upscaling and lacks other important editing tools.
- The free plan restricts image size, number, and batch features.
Review the following table to choose the best enhance photo free tool that suits your needs:
| Tools | What It Does | Ease | Strengths | Weaknesses |
| Repairit Online | Brightens and sharpens weak photos. | Very easy | Clear previews, works in the browser, supports many formats. | Larger photos may need a short wait before the preview appears. |
| Cutout.Pro | Clears blurry or dark photos with AI. | Easy | Good face cleanup, quick fixes. | Can look over-edited; slow for big uploads. |
| Picsart | Adjusts color, light, and sharpness. | Medium | Many tools and creative options. | Key tools locked; too many extra features. |
| PicWish | Sharpens unclear photos and removes blur. | Very easy | Clean results, simple controls. | Best results need payment; limited manual control. |
| ImgUpscaler | Enlarges small photos with AI upscaling. | Easy | Strong upscaling, print-ready size. | Only upscales; free plan limits use. |
Pro Tip: What If Your Enhanced Photo Gets Corrupted? How to Repair Images Safely
Sometimes an “enhance photo free” may stop opening after saving, downloading, or moving it. This failure can happen when the file breaks during transfer or when storage changes suddenly. You might see blank previews, faded colors, or errors saying the picture cannot load. These issues appear even after editing because damaged data interrupts normal viewing later. That is why safe restoration steps become helpful in such cases.
When this happens, Repairit analyzes damaged photo data and fixes issues that stop the image from displaying properly. It repairs problems like broken headers, pixel distortions, and color errors that appear after corruption. Above all, the software generates a new usable version of the image while keeping the original file unchanged.
Detailed Guide to Repair Damaged Photos with Repairit
Let’s walk through the steps below to repair damaged photos easily with Repairit:
Step 1. Import Corrupted Photos to Proceed
First, press the “+Add” button to import your corrupted photos to initiate the repair.

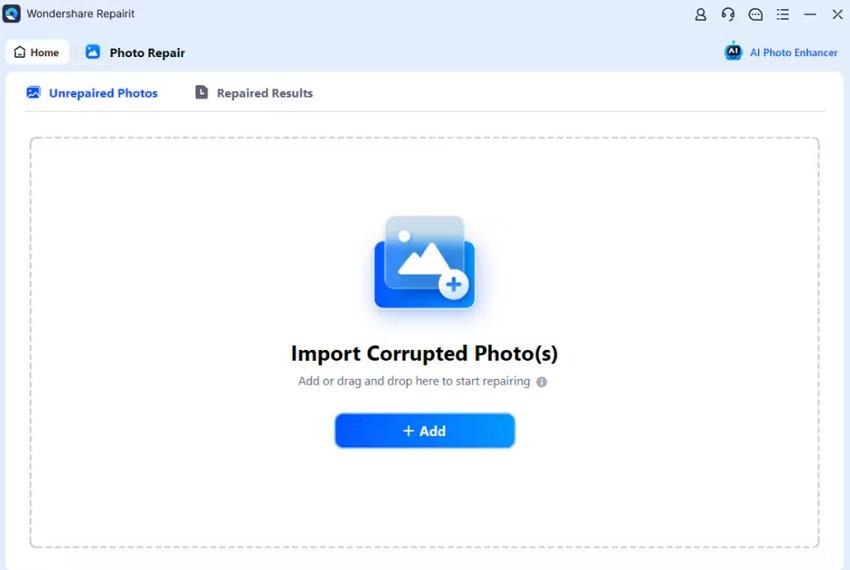
Step 2. Start the Repairing Process
Once uploaded, the photos will appear in the “Unrepaired Photos” tab with their details. Thereupon, press the “Repair” button once you review them to begin the repair.


Step 3. Preview and Save the Photos
Lastly, preview the repaired photos and press the “Save” b button to export them to your device.

Conclusion
To conclude, photo enhancement is important when images lose clarity, detail, or proper lighting. We explored why photos break and reviewed helpful tools that sharpen edges, brighten scenes, and improve weak visuals. For damaged photos, the Repairit desktop version offers strong repairing options, while Repairit Online provides fast enhancement when AI photo repair free features are not enough.