

If you’ve been wondering how to rip a video DVD on Mac without losing quality, you’re not alone. Many Mac users want to back up their movie collections, digitize rare footage, or simply enjoy their favorite films without carrying discs around. The good news? In 2025, there are multiple tools—both free and paid—that make the process fast and straightforward. In this guide, we’ll cover the legal basics, then walk you through four efficient methods, from professional-grade software to free open-source options. By the end, you’ll know the best way to rip DVDs on Mac for your needs, whether for archiving or everyday viewing.
Content
Part 1. Is it legal to rip DVDs?
Part 2. The Best Way to Rip a Video DVD on Mac
Part 3. How to Rip a Video DVD on Mac via Movavi
Part 4. How to Rip a Video DVD on Mac via HandBrake
Part 5. How to Rip a Video DVD on Mac via WinX DVD Ripper
Part 1. Is it legal to rip DVDs?
The legality of ripping DVDs depends on your country’s copyright laws. In many regions, making a personal backup of a DVD you own is tolerated, but bypassing copy protection may technically violate anti-circumvention rules. In the U.S., for example, the DMCA prohibits breaking encryption, even for personal use, though enforcement is rare for private backups. In the UK, similar rules apply after the repeal of the private copying exception. The safest approach is to rip only DVDs you own and keep the copies for personal use. Always check your local laws before proceeding with how to rip a DVD on a Mac.
Part 2. The Best Way to Rip a Video DVD on Mac
For those who want maximum quality, speed, and compatibility, VideoByte BD-DVD Ripper is a top-tier choice. This professional tool can handle both homemade and commercial discs, removing protections like CSS, AACS, and region codes. It supports over 300 output formats, making it easy to convert DVD to digital for playback on any device.
Unlike basic rippers, VideoByte is designed specifically for both DVD and Blu-ray discs, ensuring you can back up your collection without sacrificing a single frame of quality. It’s not just about creating a playable file—it’s about preserving the original cinematic experience, complete with subtitles, surround sound, and chapter markers.
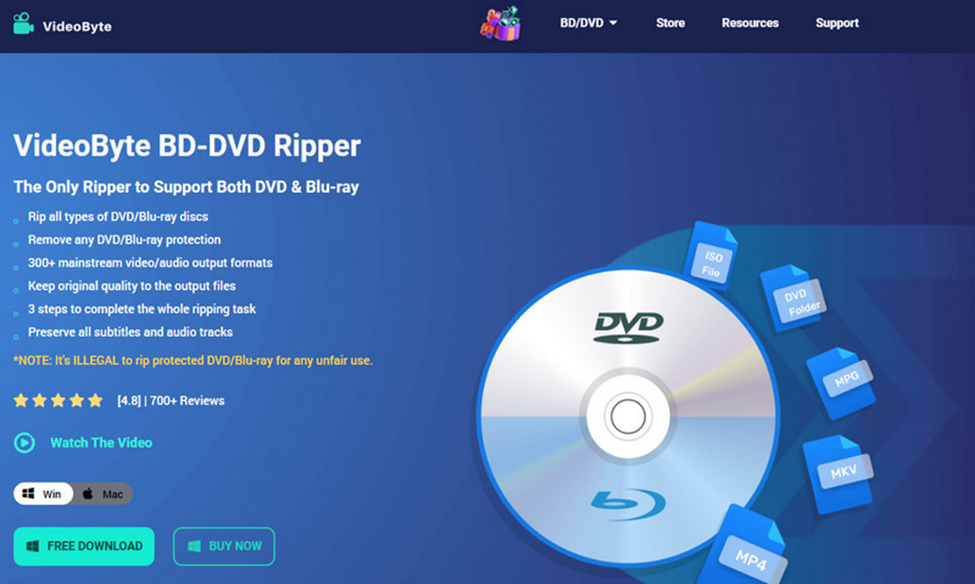
Features
- Lossless Quality: Preserve original video and audio without compression.
- Wide Format Support: MP4, MKV, MOV, AVI, and more.
- Full Control: Keep all subtitles, audio tracks, and chapters, or select specific ones.
- Hardware Acceleration: Up to 6× faster ripping with GPU support.
- Device Presets: Optimized profiles for iPhone, iPad, Android, PS5, and more.
Step 1. Install & Launch VideoByte BD-DVD Ripper on your Mac.
Step 2. Insert the DVD and click Load DVD to scan the disc.
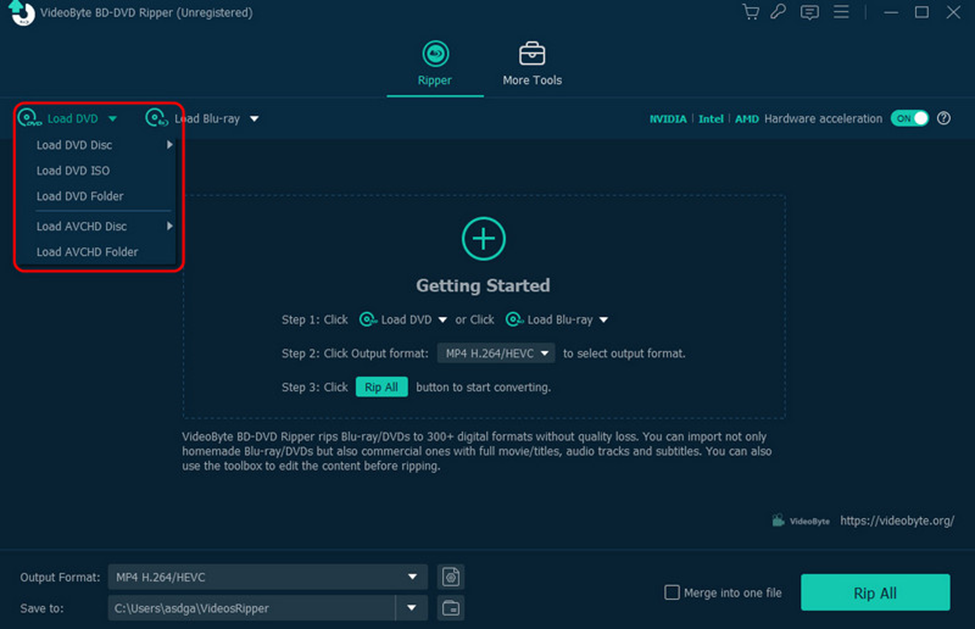
Step 3. Adjust Settings (optional): Edit resolution, bitrate, or add subtitles, etc. Once over, click Rip All and wait for the process to finish.

Brief Summary: If you’ve been asking, “How do I rip a DVD on Mac” with the highest quality possible, this is the most reliable method to convert your DVD to digital.
Part 3. How to Rip a Video DVD on Mac via Movavi
Movavi Video Converter is a user-friendly option for those who want a balance of speed and simplicity. It supports a wide range of formats and offers presets for mobile devices, making it ideal for quick conversions. However, it doesn’t bypass copy protection, so it works best with unencrypted or home-burned discs.

Step 1. Install Movavi Video Converter on your Mac.
Step 2. Insert the DVD and open the program.
Step 3. Click Add Media > Add DVD > Open DVD and select your disc.
Step 4. Choose Output Format: MP4 or MOV is recommended for compatibility.
Step 5. Set Destination: Choose where to save the file.
Step 6. Click Convert to start ripping.
Brief Summary: This method is great if you want to rip a DVD on a Mac quickly without complex settings.
Part 4. How to Rip a Video DVD on Mac via HandBrake
HandBrake is a free, open-source tool that’s popular among Mac users. It offers extensive customization, but to handle encrypted discs, you’ll need to install the libdvdcss library. If you’ve been wondering “How to rip a DVD on a Mac for free”, this is your go-to option.
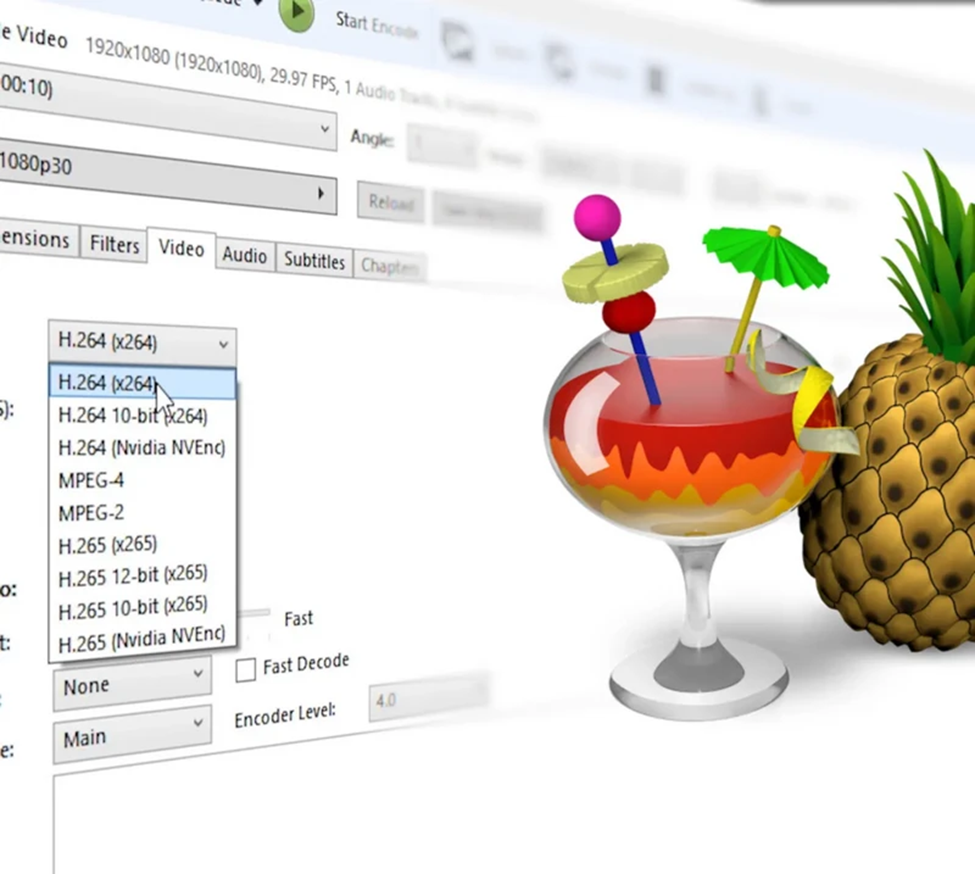
Step 1. Install HandBrake and libdvdcss on your Mac.
Step 2. Insert the DVD and launch HandBrake.
Step 3. Select your DVD drive as the source.
Step 4. Pick Title & Chapters: The main movie is usually the longest title.
Step 5. Choose Output Format: MP4 (H.264) is widely compatible.
Step 6. Set the Destination and click Start Encode.
Brief Summary: HandBrake is ideal for those who want control over encoding settings and don’t mind a slightly steeper learning curve.
Part 5. How to Rip a Video DVD on Mac via WinX DVD Ripper
WinX DVD Ripper for Mac is known for its speed and ability to handle copy-protected discs. It offers multiple output profiles, including device-specific presets, and can back up DVDs to ISO or folder formats.
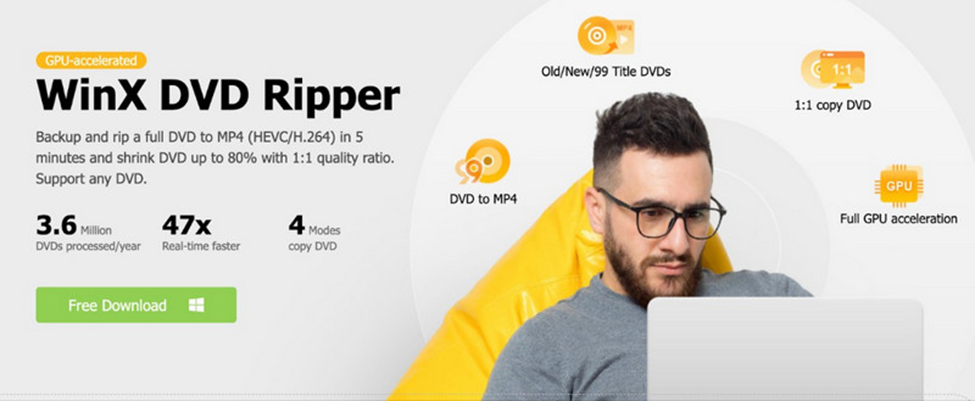
Step 1. Install WinX DVD Ripper for Mac.
Step 2. Insert the DVD and click DVD Disc to load it.
Step 3. Select Output Profile: Choose from general formats, device profiles, or DVD backup modes.
Step 4. Set Destination Folder.
Step 5. Click RUN to start ripping.
Brief Summary: If you want a fast, straightforward solution for how to rip a video DVD on Mac, WinX is a solid choice.
Conclusion
Whether you prioritize quality, speed, or cost, there’s a Mac DVD ripping solution for you. VideoByte offers professional-grade results, Movavi is perfect for quick conversions, HandBrake is the best free option for tech-savvy users, and WinX excels at speed and protection handling. Now that you know how to rip video DVDs on Mac, you can preserve your collection, enjoy movies without discs, and future-proof your media library. Just remember to follow local laws and use these tools responsibly.