
Snow blowers from John Deere (John Deere) are a popular accessory for winter cleanup. Actually, John Deere has all kinds of snow-clearing parts. These parts can turn your machine into a tool for clearing snow in winter. This guide will show you step by step how to put a snow blade on your John Deere lawn tractor.
What You Should Prepare Before Installing
A sturdy set of socket wrenches and a few open-end wrenches. Open the new snow blade kit and arrange the blades, A-frame, lift kit, pins, bolts, and other parts. As you inspect everything, pay close attention to any parts that may have been worn from previous seasons. Preparing some high-quality aftermarket John Deere parts, which have the same durability and fit as OEM parts but at a lower price. If you find any worn pins or damaged brackets, this is the perfect time to replace them.
Installing and Removing Your Snow Blade
While the steps may vary a bit between different John Deere tractor models and snow blade kits, the basic process is pretty much the same. Here’s how to do it step by step:
Safety Note
Read your tractor and snow blade manuals before you start. They have model-specific safety warnings and diagrams. Never work under a raised attachment unless it’s securely locked or propped up.
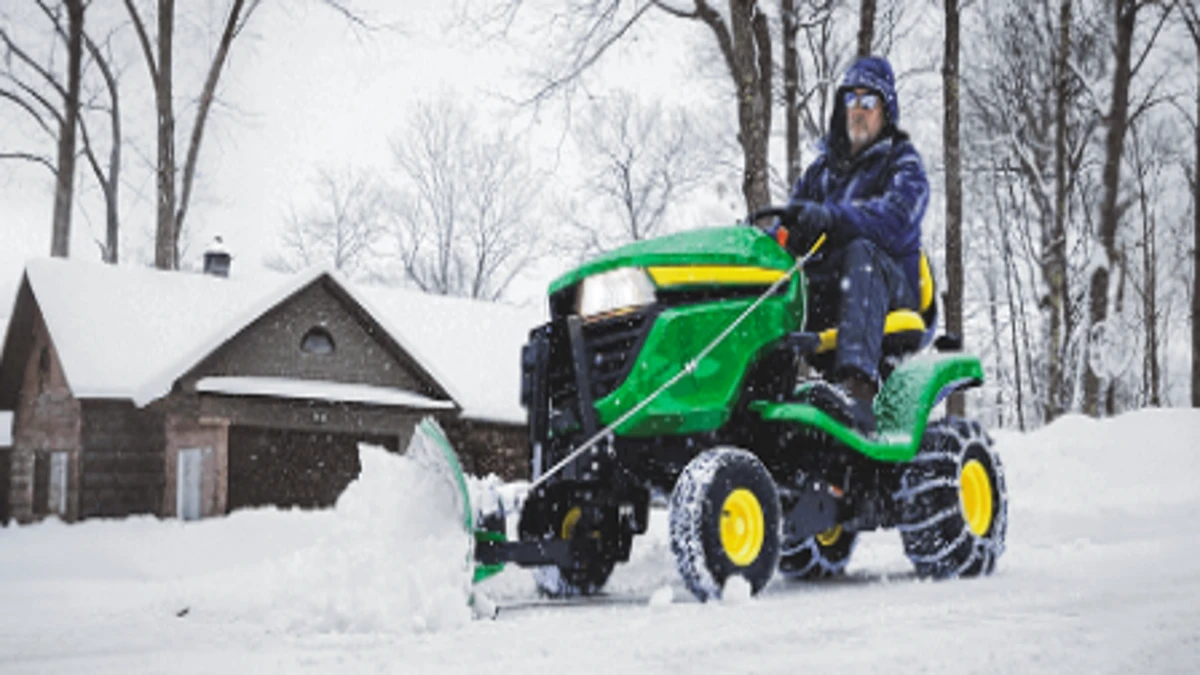
Prep the Tractor
remove any attachments that’ll get in the way—usually the mower deck. Lower the deck all the way to take tension off the belts. Disconnect the PTO cable as shown in the manual, then take the deck off. Slide it out from under the tractor carefully. You might also need to remove the front bumper if your tractor has one.
Install the Front Mounting Bracket
This bracket holds the snow blade on the tractor — it’s very important. It usually fits on the front of the tractor frame, near the front axle. Line it up with the pre-drilled holes on the frame. Tighten it well with the bolts and nuts from the kit. The hardware ison both sides. This keeps the bracket steady and straight.
Attach the Snow Blade Assembly
Attach the main snow blade unit—it’s made of the blade and A-frame. Attach the main snow blade unit—it’s made of the blade and A-frame. Push the blade to the tractor’s front. Lift the A-frame and line it up with the bracket’s mounting spots. Lock it with the heavy-duty pins and clips from the kit. Also, check if the pins and bracket are worn.
Connect the Lift Mechanism
Hook up the blade’s lift system to the tractor. Usually, this means attaching a lift rod or cable from the A-frame to the tractor’s lift lever (most are on the fender). Route the rod as directed, then secure it with the provided pins. Test the lift lever after connecting—make sure the blade lifts high enough for transport and lowers all the way to touch the ground.
Make Final Adjustments
Once the blade is installed, tweak the angle and skid shoes:
Most blades can be angled left or right to push snow where you want—set it to match your driveway. Check the skid shoes on both sides of the blade. They control how close the blade gets to the ground, so you don’t scrape gravel or concrete. A good starting height is about 1/4 to 1/2 inch off the ground on a flat surface.
Removing the Snow Blade
When winter ends, just do the installation steps in reverse: Lower the blade onto wooden blocks to hold its weight. Disconnect the lift rod, pull out the main mounting pins, and roll the blade away from the tractor. You can take off the front bracket, or leave it on if you’ll use other front attachments later.
Conclusion
Fitting a snow blade to your John Deere lawn tractor is totally doable, and it’ll make your machine way more useful all year round. Just follow these steps and get everything ready first, and you’ll have your tractor all set for winter jobs in no time. This one little attachment will save you hours of tough, tiring work—you can clear snow fast and easy, then head back inside to enjoy the warmth.